If youve been following this blog lately, you know that were engaged in a multi-week battle of wits with a pile of eggshells. Specifically, were trying to figure out a way to isolate calcium carbonate from eggshells to use as a leavening agent. The calcium carbonate is bound up in a matrix of protein that makes it less accessible for leavening action, so for maximum leavening effect, we have to either dissolve away the protein or dissolve away the calcium carbonate and then regenerate it. Last week, we tried boiling ground-up eggshells in lye to dissolve away the protein. (It didnt work very well, but at least the biscuits were tasty.) Today, we take a look at the other option--dissolving the calcium carbonate and regenerating it.
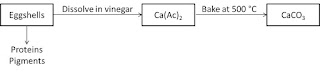
The first thought we had was that the CaCO3 in the eggshells can be dissolved by the acetic acid in vinegar to make calcium acetate (Ca(Ac)2), which can be decomposed to CaCO3 around 400 °C.
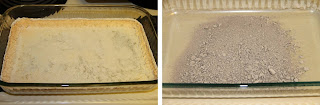
Unfortunately, some of the eggshell proteins are also apparently soluble in vinegar, and when we made calcium acetate by dissolving eggshells in vinegar and evaporating all the liquid, we ended up with a light-brown colored solid, which yielded a gray powder after a clean cycle in the oven (which gets close to 500 °C). We got a similar looking powder when we put ground whole eggshells through the oven clean cycle.
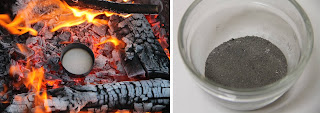
The product from calcining eggshells in the rocket silo was actually a little darker colored. As a point of reference, were looking for CaCO3 as a fine, white powder.
This is actually a problem thats bothered us since we wrote about grinding up eggshells way back when this blog was just an infant. While its usually possible to burn organic matter (e.g., proteins) off of inorganic residue (e.g., wood ash, glass, stainless steel) at 400-500 °C (750-930 °F), eggshells hold on to the organic matter from their protein until 900 °C (1650 °F). Unfortunately, at that temperature, our desired CaCO3 has transformed into lime (calcium oxide, CaO). Thus, its no surprise that when we put a pile of eggshells in our oven and set it to the clean cycle, our pile came back grayish-colored instead of the white color of pure CaCO3. (Although, we were surprised at the time since we hadnt done much reading on the topic!)
So, were 0-for-2 on getting our pure CaCO3 out of the eggshells at this point, but its worth noting two things. First, while we havent been able to get pure CaCO3 from eggshells, the gray powders from either the decomposed eggshells or the decomposed calcium acetate react much more vigorously with vinegar than the raw eggshells. Still not as vigorously as baking soda as the video below shows, but bubbles abound nonetheless. So, maybe the gray powders are worth trying as leavening.
Second, can we approximate a best-case scenario for obtaining pure CaCO3 from eggshells? Yes! We can get a bag of pure CaCO3 for a couple bucks at the local homebrew store. So while our blog post declaring victory on purifying CaCO3 from eggshells will have to wait until another day, we can still see what a best-case scenario for eggshell-based leavening would look like. Biscuit baking time!
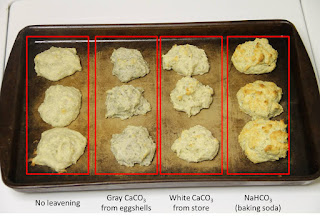
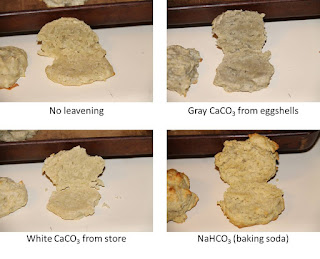
Same recipe as last time, but only four sets this time: no leavening, gray CaCO3 from eggshells, white CaCO3 from the homebrew store, and NaHCO3 (baking soda). Very similar results as last time, too. The gray CaCO3 biscuits are definitely more risen than the no leavening control, and similar to the biscuits we baked last week from raw and lye-boiled eggshells. The white CaCO3 biscuits were noticeably more risen than the gray CaCO3 biscuits, but still couldnt hold a candle to the baking soda biscuits.
The textures of both sets of CaCO3 biscuits were similar to last weeks results, too. Not completely cooked through at the 20 min mark, while the baking soda biscuits were definitely done.
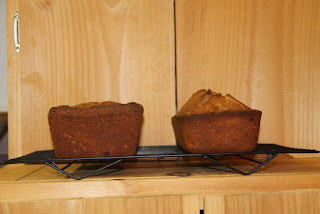
The effect is more pronounced for banana bread. Can you guess which loaf used gray CaCO3 from eggshells as leavening? (Hint: its not the one on the right--that one had baking soda.) The grand conclusion from all these experiments? Even though the CaCO3 releases carbon dioxide gas when mixed with an acid (same action as baking soda), the slower reaction kinetics mean that eggshell-based leavening cant get the job done.
Have you ever baked with eggshells or tried to isolate CaCO3 from them? How did it turn out?
On Thursday, we posted about historical methods to drip lye and some of the chemistry associated with it. Today, we wanted to talk about measuring the strength of the lye to check if its concentrated enough for making soap. In the olden days, that was often done with some sort of density test, either by floating an egg or potato, or matching the density of the lye solution with a saturated table salt solution (sodium chloride, NaCl). An egg has a density of 1.03-1.1 g/mL, and a saturated NaCl solution is a little more precise at right around 1.2 g/mL, but in our soap calculations, we normally use a solution that is 1.3 g/mL, according to density-sodium hydroxide concentration correlations. One initial conclusion from that is that old-time soap makers probably used less concentrated lye solutions. Similarly, older soap recipes often call for cooking the lye water and fat together (i.e., hot process soaps), which probably boils off a lot of the extra water.
For modern homesteaders, who might have a scale and measuring cup handy, it would be much more precise just to measure the density of the lye solution directly. (A graduated cylinder would make this calculation--and other density calculations you might want to do--more precise, but a measuring cup, used judiciously, should be good enough.
Another technique is to use a pH indicator and either dilute a small (representative) portion of the lye water or titrate it with an acid (such as vinegar) to find the strength of it. The pH indicator would also be useful during the soapmaking process to check the progress of the saponification reaction.
Lets take a look at each of those techniques in more detail.
To make soap, we normally use a ratio of something like 2.89 oz NaOH to 7.87 oz water, which works out to about 26.9 wt% NaOH. According to the above calculator, that should give us a solution density of 1.29 g/mL. (The analogous numbers for KOH lye would be 4.06 oz KOH to the same amount of water, giving 34.0 wt% KOH, and a density of 1.33 g/mL.) If we take an egg density of 1.1 g/mL, we can calculate the amount of water that should be displaced by the egg if we know the volume of it.
A typical large egg has a mass of 57 g, corresponding to a volume of 51.8 mL. Buoyancy dictates that the egg should displace 57 g of the lye solution, which will correspond to a volume less than 51.8 mL if the lye solution is more dense than the egg (which it should be if the egg is floating). As an approximation, we can find an equation for an egg and make a graph to see how much of the egg should be above the water for a quarter-sized interface.
The egg equation came from here, but we normalized it to match the dimensions of an actual egg. We assumed that an egg was sufficiently symmetrical to use a 2-D projection and calculate areas instead of using a 3-D model and calculating volumes. In reality, the egg will sit with the skinny end slightly lower in the water since the air pocket is toward the flatter end. In any case, leaving an area the size of a quarter above the surface would require a lye density of 1.13 g/mL, which is considerably less dense than our standard recipe, which has a density closer to 1.3 g/mL. If the egg were a little less dense (toward the 1.03 g/mL end), it would sit higher. As a point of reference, a potato has a density near 1.09 g/mL, in the same range as an egg.
This is a real egg in our standard lye solution (using NaOH). The solution is yellow because we were testing pH indicators with it (described below). The real egg looks not too far off of the graphical one, but there are more precise ways to test the lyes strength.
For example, using data found here (and their related NaOH calculator), we can make a correlation, measure the density of the lye directly, and use the correlation to calculate the concentration. It would help to have a digital scale and a graduated cylinder, but you can probably get at least as close as the egg/potato method with an old spring-loaded scale and a measuring cup. We dripped a small batch of lye recently and were doing tests with it, but accidentally spilled it in the kitchen sink before we could test this method. For lye dripped from ashes, use the KOH equation. Note that if our solution density is 1.3 g/mL, our lye concentration (as KOH) is about 34 wt%, or 5.2 molar. This density method will be our favorite lye strength test going forward.
Another way to test the strength is with a pH indicator. One natural pH indicator is cabbage juice, which contains anthocyanidin pigments. (As an aside, we noticed similar color changes in elderberry juice and wondered why; elderberries have a similar set of pigments.) These pigments change structure as the pH of a solution changes, with each structure having a different color. See here for more info.
The pigment structures of the cabbage anthocyanidins look something like this, with the different colors as shown. Part of the reason the change from red to purple happens over such a wide pH range is the colorless intermediate. Similarly, the yellow compound starts to form at pH > 8, but doesnt become the dominant form of the molecule until much higher pH (the presence of both yellow and blue make the solution green, kind of like a Ziploc bag). The "R" groups are glucosides (i.e. substituted glucose molecules). Sources for this figure came from here, here, and here. If you took note of the concentrations above (i.e., that our standard soap recipe calls for 5.2 molar lye) and you are familiar with the pH scale, you might realize that theres a bit of a problem here. That is, our lye should be at pH 14.7, but our indicator will be yellow at every pH > 11.
Fortunately, we can dilute a small, representative portion of the lye to bring it into the pH range where the indicator is effective. On the far left in this picture is an undiluted lye solution we dripped from some wood ashes a few weeks back; its yellow, which means the pH is at least 11. Since pH is measured on a log scale, diluting by a factor of 10 (conveniently 1 teaspoon solution plus three tablespoons water) should decrease the solution pH by one unit (assuming the water is actually neutral). On the first dilution, the solution is already green! That means the undiluted solution was not much over pH 11. The further dilutions (using one teaspoon of the first dilution plus three tablespoons water, etc.) are consistent with that conclusion, looking similar to pH 9 and pH 7-8 solutions above. The upshot of this technique is basically (heh) that if the lye is concentrated enough for soapmaking, it should take at least four 1:10 dilution steps to show a color other than yellow. Alternatively, that means that we should concentrate our lye solution by a factor of 1000 before using it to make soap. Unfortunately, we only made around a quart to begin with, so well only be left with a few drops at the end--not enough to do much with (even dissolve a feather, which was another test of lye strength we were going to try).
Another approach would be to titrate the lye with an acid, and figure out how much acid we needed to observe a color change. Maybe that will be the subject of a future post.
Guess well just have to dry it down with waste heat from the oven (after baking bread or something) and store it in a jar until we can make some more!
Also, in case youre interested, heres how we made the pH indicator solution. We chopped about a third of a cabbage to give around four cups chopped cabbage.
Then we poured about two cups boiling water onto the cabbage and let it steep for about two hours.
Then we strained out the cabbage (and made coleslaw!), leaving this dark purple-colored liquid. We add about a teaspoon of this cabbage tea to a cup of liquid to test the pH. Its a little-known fact that a hot jar of this liquid was the inspiration for both the band name Deep Purple and their hit single Smoke on the Water. (Dont bother looking that up.)
Have you dripped lye from wood ashes? What did you use it for? How did you test the strength? Let us know in the comments section below!
We skipped our HAP post last week because there wasnt too much to report on, other than the potato starch experiment. We mostly did that, played in the snow, and tried to figure out why our bees died (more on that in a few days). But there were a few snippets of progress this week. Heres how we entertained ourselves:
We had collected our soil samples back in early February, when the ground was unfrozen and dry from a warm and sunny January. But we finally got the dirt fully dry and broke up all the chunks.
That meant it was ready to bag it up and send to Massachusetts for nutrient and heavy metal testing! Hopefully we only have to do the metal testing once, since its expensive.
Saturday was Pi Day. Were trying to cut down on our sugar consumption, but on a nerdy holiday that celebrates with dessert, we didnt stand a chance. The recipe was essentially this.
Ok, the real St. Patricks Day isnt until Tuesday, but Sunday was the start of Irish Food Week here at the Lab. Plus, we couldnt wait until Tuesday to cook up our corned beast because weve got pesky obligations that last all day, e.g., off-homestead work.
What made you happy this week? Let us know in the comments section below!
Its been a while since we posted a HAP post, but with our schedule finally settling back to normal after several crazy months, its time to get back on track. Here are a few things that made our week.
The chard and kale, protected by the row cover chicken tractor, survived the first couple snows of the winter. The temps only dipped down into the upper 20s (°F), so the real test will come later. But so far, so good!
Some of the unprotected dandelions survived, too, including this audacious specimen! The last few days its been warm enough for the bees to fly, too, and this little guy has very little competition for their pollination services. Well played, dandelion.
We finally got the broilers their own setup in the shed, with some pasture space outside. Better for them with more space, better for us because theyre easier to take care of than when theyre inside the brooder box. This batch of broilers, although almost 20% had to be terminated early for various reasons, was a lot cleaner and more rambunctious than previous batches. They even wandered away from the feeder to explore the pasture at times! They all went in the freezer on Saturday, which means were about ready to close the books on them and write up the stats.
Did you know that the bottom grate of a Smokey Joe grill fits perfectly inside a Lodge 12", 8-quart dutch oven? Thats an important discovery considering how many chickens we now have available to roast.
A few weeks back, Katie found a recipe for two-ingredient peanut butter-banana ice cream, with which we are currently infatuated (although theres no sign of this being just a phase). This recipe is itself an adaption of the one-ingredient banana ice cream, which apparently has been known among strict herbivores for many years. (Can you guess what the one ingredient is?) While both of these recipes would more appropriately be labeled sorbet (although they dont quite fit that label, either), they produce a frozen dessert that really does have the consistency and mouthfeel of ice cream. So, what is it about bananas that makes them so special? And more importantly, can we do something similar with the last of the incoming apples and plums from the yard, now that our jam coffers are full for the year?
The general recipe calls for cutting bananas of the appropriate ripeness into small pieces, freezing them, then mashing them (e.g., in a food processor or blender). When the mash warms up a little, the grains coalesce, producing the ice cream. How does it work? The one-ingredient recipe linked above mentions that bananas work well because they are high in pectin. But many other fruits are also high in pectin--would it work just as easily with them? This article explains that its a little more nuanced than that--its not just pectin, but pectin, fiber, and sugar that work together to give the creamy texture. (From a physical chemistry perspective, the smaller the ice crystals in the product, the creamier it will feel. The sugar and polysaccharides decrease waters ability to form and grow ice crystals by messing with waters hydrogen-bonding network.)
So, fruits that are high in pectin, fiber, and simple sugars should be able to make a nice creamy sorbet/ice cream (sorbeam?), too. Time to compare some data!
Fruits with a lot of sugars, fiber, and pectin give a creamier texture in one-ingredient sorbeams. Data sources are here, here, and the paper linked here. A qualitative list of pectin levels in fruit can be found here (and many other places online). Bananas are unique in their high content of available sugars, nearly twice as high as the other kinds of fruit for which we could find numbers. So, in theory, it should work a lot better with bananas than almost any other fruit. But hey, were experimentalists! Why dont we try it with our apples and plums anyway, and see if we like it! (After all, if if its not all that good, Jake will eat it anyway.)
At first, the frozen fruit (apples, here) makes sort of isolated granules.
As it starts to warm up, the granules start to stick together, but it stays kind of icy. Its vaguely reminiscent frozen applesauce--not bad, but not what were shooting for.
But add bananas, and bam! Creamy ice-cream-like texture.
Same thing for the plum as for the apple. (If you leave the peels on, they stay in the sorbeam as fun confetti sprinkles!)
You can scoop it into bowls and top it with dried apple slices and cinnamon, or whatever normal people put on ice cream.
The sorbeams made from either just apples or just plums were good, but not quite as creamy as weve grown accustomed to with the bananas. So we wondered, what if we mixed these with banana sorbeam to improve the texture? And it worked! The table shows Katies response to each experiment. Moreover, since the banana is a fairly subtle flavor, especially if the bananas arent overly ripe, the mixtures really tastes more like apple or plum with just a hint of banana. Also, mixing in some sugar with the solo apple sorbeam made it taste less like frozen applesauce and a little more creamy, consistent with our hypothesis that its the relatively low sugar content preventing the just-apple sorbet from being awesome. (We didnt try adding sugar to the plum.)
The amount of banana flavor depends on the ripeness of the bananas. (The creaminess of the texture, to some extent, too.) While visiting family in July, we were introduced to a new term for bananas with brown spots: giraffey (adj.: having the appearance of giraffe). Weve expanded the concept to develop an entire animal-themed scale of banana ripeness. Further to the right gives more banana-ey flavor; too far to the left makes the sorbeam taste starchy and astringent. We like somewhere between giraffe and black bear; those less fond of banana flavor could edge toward puffer fish, but definitely dont go all the way to hummingbird. Photo credits for hummingbird, puffer fish, giraffe, black bear: Wikipedia. Other sources for the green, yellow, spotty, and black bananas.
How do you prepare frozen fruit desserts? Let us know in the comments section below!
A while back, we wrote about our green onion powder, which turned out to be a great way to preserve green onions when we had too many to use up fresh. Earlier this summer, we found ourselves in a similar situation with some overwintered onions that suddenly bolted. And, as with everything else around here, the process is constantly evolving. So, heres another couple ways to make green onion powder.
Onion stalk overload! Ahh!
Cleaned and chopped, they look much less intimidating. We mentioned that our makeshift solar wax melter only reached about 155 °F, which wasnt very good for melting wax, but is just right for drying food. Were still working on making dehydrator trays to fit our Langstroth boxes, but the regular dehydrator trays stacked inside give a visual approximation. Not shown in this picture, but also dried in this batch were some chopped garlic scapes and dandelion roots.
A few weeks later, theyre nice and dry. They probably didnt need so much time, but we got busy with other stuff and had to let them go that long. The onions probably would have been good for grinding straight from the dehydrator, but we had the unfortunate scheduling demand of taking them out first thing in the morning, when it was cool and damp. So, in the oven they went at 150 °F for an hour to re-crisp them up.
For the grinding, we turned to the grain mill, which weve now used on eggshells, sugar, sea salt, and green onion powder (also garlic scape powder and dandelion root powder), but not yet grain. As with the other substrates, it makes a nice, fine green onion powder. It works really well on the garlic scapes and the dandelion roots, but the chunks of onion we had were a little too large and flimsy (even when crunchy) to really feed into the grinder well.
So, after a while, we turned to the blender (a food processor or spice grinder would also work here). It doesnt get everything chopped up perfectly, but for many applications (like soups or casseroles, for example), the larger chunks would be fine.
We sieved out the big chunks anyway to get some fraction of fines that make a good powder, and the rest we saved for cooking when the size doesnt matter.
Just for comparison, on the lower left is the grain mill powder, on the upper left is the fines from the blender, and on the right is the coarse fraction from the blender. All perfectly useful in their own right, and all filled with that excellent green onion flavor.
How do you make green onion powder? (Or regular onion powder. Or other powdered garden things.)
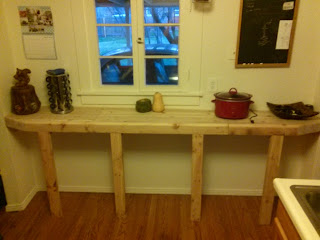
A few weeks ago, we mentioned that one of our main goals this year was to finish the butcher block counter (and corresponding cabinets) we built to give our kitchen some extra horizontal work space and culinary device storage capacity. Finally, after more than a year of testing it in-place, we slapped some doors on it and put a water-resistant finish on the top. There are a couple naggly things to finish up yet, like deciding whether we also want to finish the cabinet doors, but by and large, we think the project is ready for blog-reader eyes.
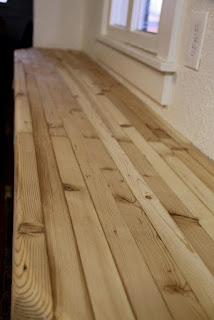
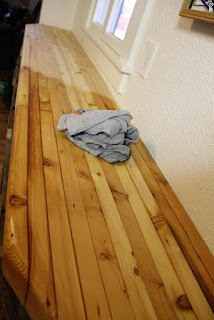
This is what it looked like a year ago. We made the top out of reclaimed 2 x 4s (yep, pine!) that we planed clean and glued together. The end-to-end length is about eight feet, so we made each row out of a six-footer and a two-footer, alternating the two-foot ends (i.e., one row was 6-2, the next was 2-6, and so on). Its about 16 inches front to back. Despite our best efforts, there was a stretch in the middle where they didnt line up perfectly. It took us about a year to acquire a belt sander, which made the job of blending the slabs tolerable.
We also needed the sawdust from sanding to make some wood putty, of which a significant amount was required to fill in all the imperfections in the wood.
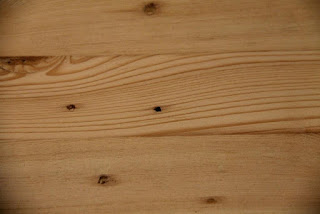
For example, there were a lot of nail holes like these.
After filling with putty and sanding, the same holes looked like this. Theres a bit of discoloration around the nail holes yet, but they almost look like tiny knots.
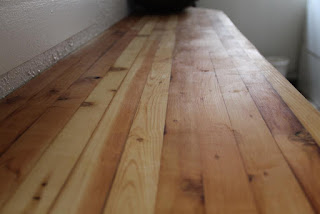
Viewed from the angle of a typical adult human walking by, the now-filled holes look downright acceptable. However, with a lot of board-to-board color variation like this, the sawdust used to make the putty doesnt actually match any of the wood colors perfectly.
Back in place in the kitchen, its time to add some water resistant coating. We could have maybe foregone the finish, but Jake does a lot of drooling when Katies cooking. Better not to risk it.
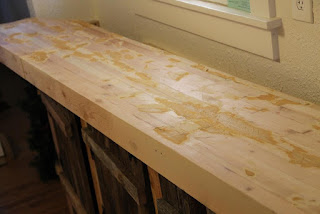
We used the Howards butcher block conditioner, which is a mix of mineral oil, beeswax, and Carnauba wax. It definitely enhanced the wood color and soaked in pretty quickly.
Finished top. Katie approves.
Theres a bit of a sheen to it, but not too bad.
Add some rustic-looking doors, and this thing is starting to get some personality! Of course, if you build the doors while the top is off, they might not fit perfectly.
There, thats better.
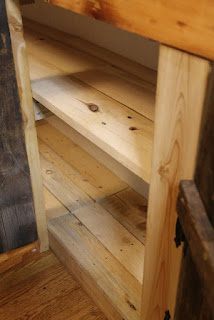
Oh yeah, forgot to mention the shelves. Theyre reclaimed pallet wood from the two best pallets weve ever acquired. The top was hardwood (aspen, judging by the scent when cutting it), the bottom had some nice blue-stain pine.
Finally, seal the edge with some silicone caulk to prevent water from getting back there and to prevent potential admirers from noticing the uneven ends.
Done! (as long as we decide not to coat the doors...)